Lab 1
Lab 1 was divided into two parts, and we were given two weeks to complete the assignment. Part Lab 1A, taught us a bit about the Arduino IDE and programming the Artemis board. This involved running various programs on the board that were baked into the IDE, and it was something of a Prelab for Part 1B. Part 1B taught us about Bluetooth connectivity and using Jupyter Lab notebooks. This involved more free-thinking and use of both Arduino and Jupyter notebook to find correct UUIDs and send the right Bluetooth signals.
Materials:
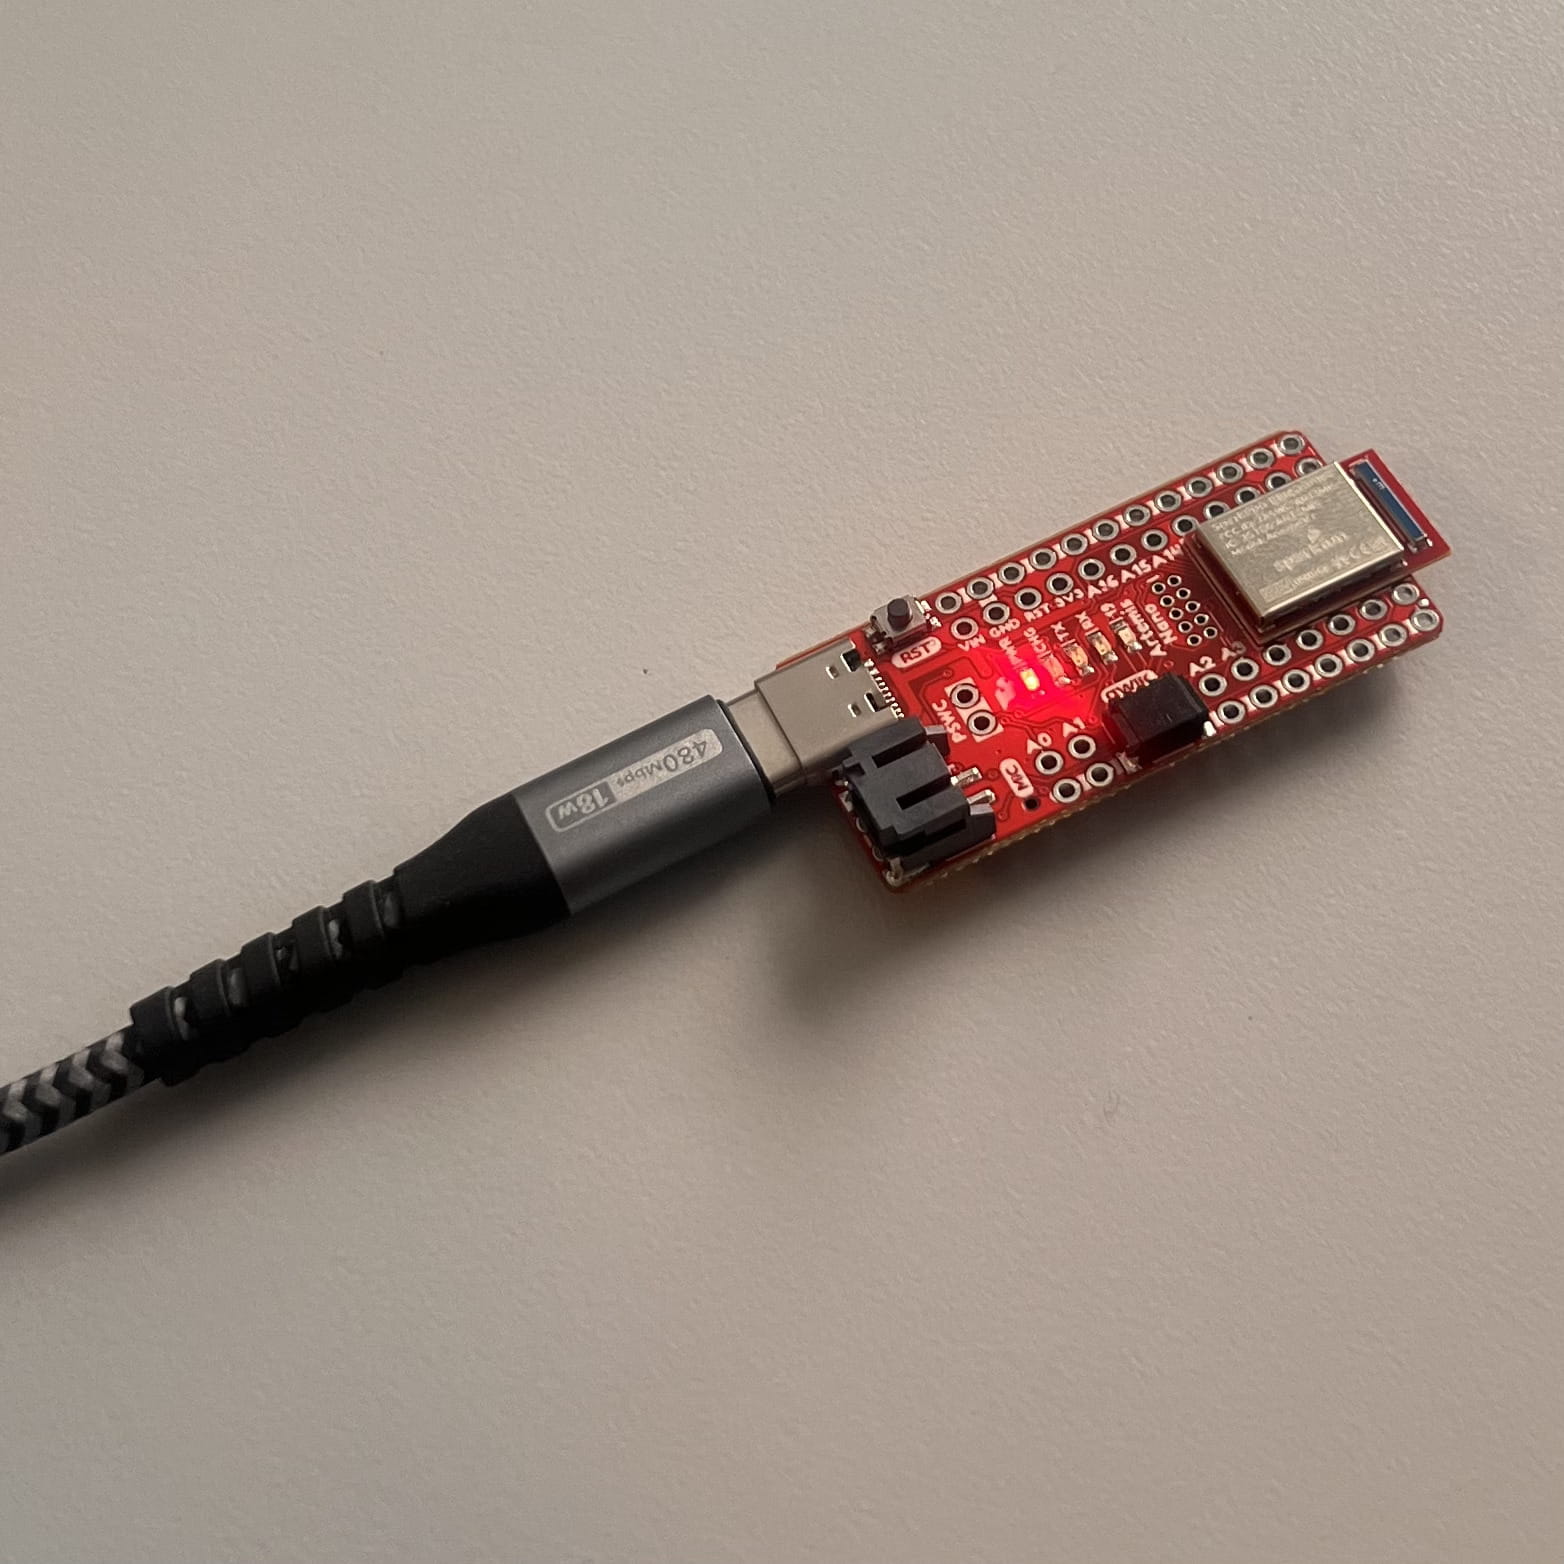
- 1 x SparkFun Redboard Artemis Nano
- 1 x USB Type-C Cable
Lab 1A
Part 1
For the first part we simply downloaded the relevant Redboard Arduino Library from the Library Manager. I had issues with connectivity, and fixed them by downloading a CH340 Driver. The video below shows a successful connection.
Part 2
Here, I run the Blink script from Arduino from File -> Examples -> Blink
Part 3
Here, I run the Serial script from Arduino from File -> Examples -> Apollo3 -> Example4_Serial. To view the output I open the Serial Monitor and ensure the baud rate is 115200.
Part 4
Here, I run the Analog Read script from File -> Examples -> Apollo3 -> Example2_analogRead in order to test the temperature sensor. I move my finger on and off of it, as well as blow on it to get the temperature to change. I view the output in the serial monitor.
Part 5
Here, I run the Microphone Output script from File -> Examples -> PDM -> Example1_MicrophoneOutput in order to test the microphone. I make various noise and view the changes within the Serial Monitor.
Part 6 (5000-Level Students)
For the last part of the Prelab/Part 1A I create something like an electronic tuner by using the Microphone Output from before and, although imperfect becuase I did not make it the exact range, I have certain frequency ranges print A4, D4, or E6. I view the changes in the Serial Monitor and use an online frequency generator to play frequencies for the code I write to detect.
  // After ui32LoudestFrequency runs...
  if (ui32LoudestFrequency < 380) {
    Serial.printf("Out of range\n");
  }
  else if (ui32LoudestFrequency < 440) {
    Serial.printf("A4\n");
  }
  else if (ui32LoudestFrequency < 587) {
    Serial.printf("D5\n");
  }
  else if (ui32LoudestFrequency < 1317) {
    Serial.printf("E6\n");
  }
  else {
    Serial.printf("Out of range\n");
  }
Lab 1B
To set up this part of the lab I set up a Python virtual environment through the Windows Command Prompt, installed Jupyter Lab, and added needed dependencies and course files. I then successfully launcehed the Jupyter server. I flashed ble_arduino.ino onto the Artemis, and retrieved its MAC address. I then generated a UUID to update the connection.yaml configuration. The purpose of this part of the lab is to be able to test our sensors better by creating a wireless debugging system. This part will ensure we recieve timestamped messages from the Artemis Board.
Part 1
In this part the ECHO command is used to send a string from the computer to the Artemis Board. The computer then recieves and prints the string.
  case ECHO:

    char char_arr[MAX_MSG_SIZE];

    // Extract the next value from the command string as a character array
    success = robot_cmd.get_next_value(char_arr);
    if (!success)
        return;

    tx_estring_value.clear();
    tx_estring_value.append("OkiKar --> ");
    tx_estring_value.append(char_arr);
    tx_estring_value.append(" :)");
    tx_characteristic_string.writeValue(tx_estring_value.c_str());
    Serial.println(tx_estring_value.c_str());

    break;
  ble.send_command(CMD.ECHO, "Finally...")
  s = ble.receive_string(ble.uuid['RX_STRING'])
  print(s)

Part 2
For the next task we send three floats to the Artemis board using the SEND_THREE_FLOATS command and read the three values from the Serial Monitor.
  case SEND_THREE_FLOATS:

    float f1,f2,f3;

    success=robot_cmd.get_next_value(f1);
    if (!success)
        return;

    success=robot_cmd.get_next_value(f2);
    if (!success)
        return;

    success=robot_cmd.get_next_value(f3);
    if (!success)
        return;

    Serial.print("Three floats: ");
    Serial.print(f1);
    Serial.print(", ");
    Serial.print(f2);
    Serial.print(", ");
    Serial.print(f3);
    break;
ble.send_command(CMD.SEND_THREE_FLOATS, "1.00|2.00|3.00")

Part 3
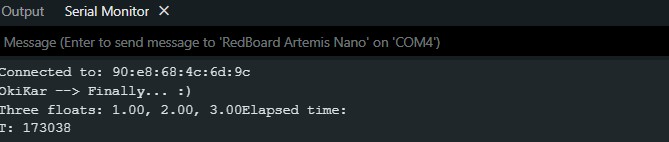
In this part I add a command GET_TIME_MILLIS which makes the robot reply write a string, such as “T:123456” to the string characteristic.
  case GET_TIME_MILLIS:

    tx_estring_value.clear();
    tx_estring_value.append("T: ");
    tx_estring_value.append((int)millis());
    tx_characteristic_string.writeValue(tx_estring_value.c_str());
    Serial.println("Elapsed time: ");
    Serial.println(tx_estring_value.c_str());

    break;
  ble.send_command(CMD.GET_TIME_MILLIS, "")
  t = ble.receive_string(ble.uuid['RX_STRING'])
  print(t)
Part 4
Set up a notification handler in Python to receive the string value (the BLEStringCharactersitic in Arduino) from the Artemis board. In the callback function, extract the time from the string.
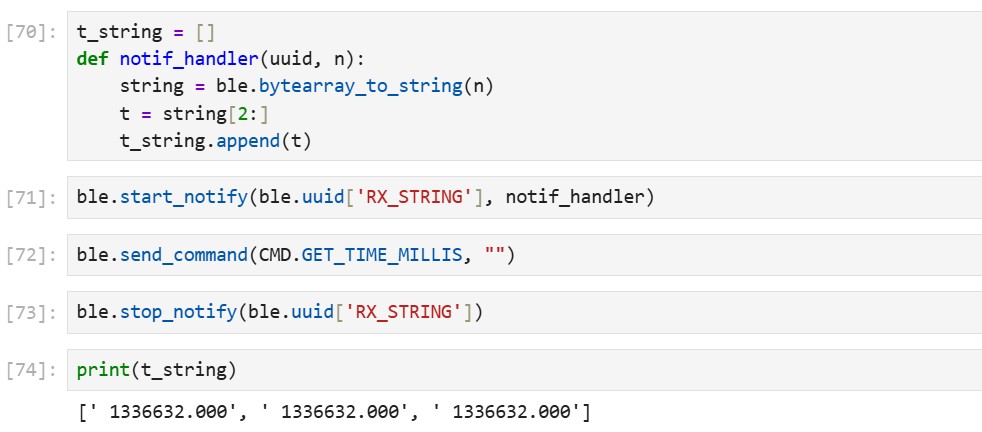
Part 5
Write a loop that gets the current time in milliseconds and sends it to your laptop to be received and processed by the notification handler. Collect these values for a few seconds and use the time stamps to determine how fast messages can be sent. What is the effective data transfer rate of this method?
Part 6
Part 7
Part 8 (5000-Level Students)
Technologies Used: VS Code, GitHub, Arduino, Python, Jupyter Notebook, Redboard Arduino Nano
Back to Projects