Aeroshell
The aeroshell has been my longest and most complex learning process from when I agreed to take the position of Composites Subteam Lead to when the product was cured. In terms of creation, fabrication, finding people to help, getting the steps right, and completion of the project there were so many mistakes and so many learning opportunities. It has been an agonizing pleasure to be in charge of this undertaking.
I came in knowing nothing and my predecessors either transferred to other teams or graduated. There was little to no documentation so I began researching how to create composite structures and networking with Composites Subteams on other Project Teams besides Hyperloop to get insight and assistance with the process.
Thankfully, the Ergonomics (Composites)
Team Lead of Cornell Baja Racing taught me the layup process, gave me a roadmap for future use, and explained the materials needed. Everything lined up with what I had researched so it was going well. Even more fortunately, my predecessors had left me almost all the materials needed to do the job.
From here I began my own prototyping.
 This was Spring of 2024 and I had no underclassmen on my team to help me at that point. I
found an old miniature negative (outer profile of what we want to create) mold as well as two miniature positive (inner profile as what we want to create) molds left by upperclassmen of the past. I practiced creating a layup surface like the one on the negative mold that was left, as well as laying up using that same mold.
This was Spring of 2024 and I had no underclassmen on my team to help me at that point. I
found an old miniature negative (outer profile of what we want to create) mold as well as two miniature positive (inner profile as what we want to create) molds left by upperclassmen of the past. I practiced creating a layup surface like the one on the negative mold that was left, as well as laying up using that same mold.
Layup Process:
- Dry sand surface of high density foam to be smooth with 220 grit sandpaper
- Spray 5 layers of Duratec Surface Primer
- Wet sand dried Duratec grit by grit up until it’s smooth
- 320→400→600→800→1000→1200→1500→2000
- Lay carbon fiber layer
- Coat with 3:1 mixture of Epoxy to Cure
- Lay kevlar layer
- Coat with mixture
- Lay carbon fiber layer
- Coat with mixture
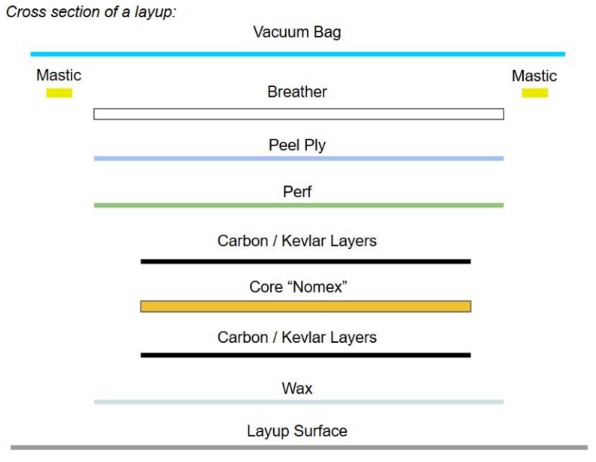
- Cover with perforated ply to wick excess epoxy out of fabric
- Cover with breather to absorb excess epoxy
- Place vacuum tube on top of breather and cut small slight hole through vacuum bag for vacuum nozzle to stick through
- Cover with vacuum bag and poke nozzle up through previously made hole
- Stick edges of vacuum bag to Mastic sealant tape and stick tape to table for airtight seal
- Activate vacuum pump and wait until you see full tight vacuum around profile of layup object with air clearly evacuated from under vacuum bag
- Wait until cured
Skipping ahead, the layup I did with
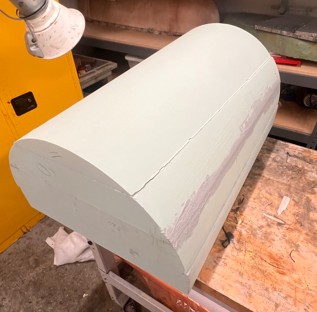
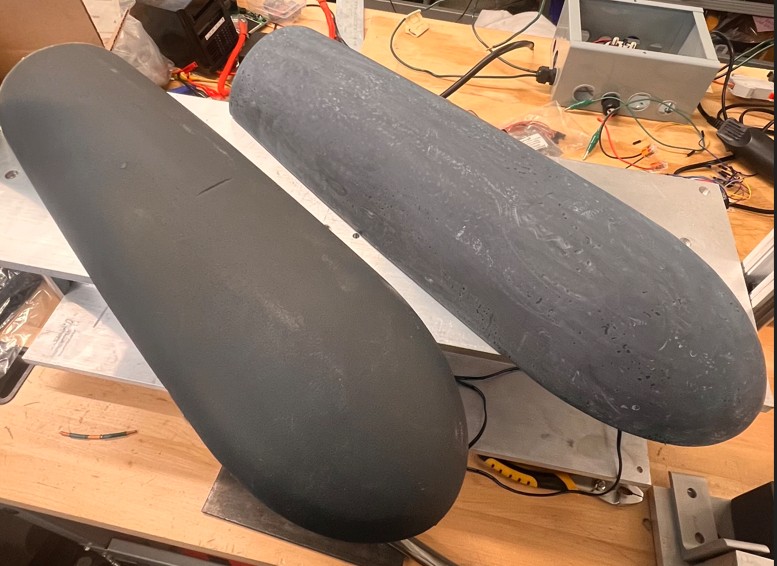 the negative mold went very well. My attempt to create a good layup surface with the first positive mold; however, went poorly. I now know it is because I did not spray multiple layers of Duratec onto the high density foam and sand the combination down smooth. The more rough looking mold is actually better made by myself and the two underclassmen on my Subteam the following semester. The one in front is the one I made with only one pass of Duratec airbrushed onto it and you can somewhat see the green of the high density foam through the airbrushed layer of Duratec.
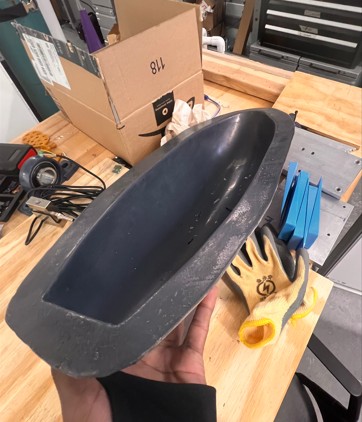
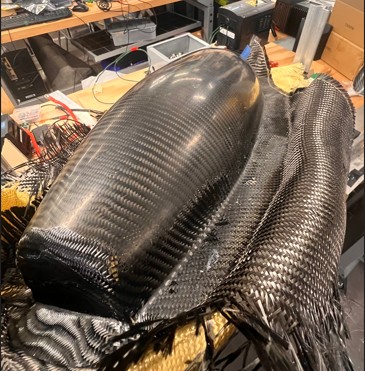
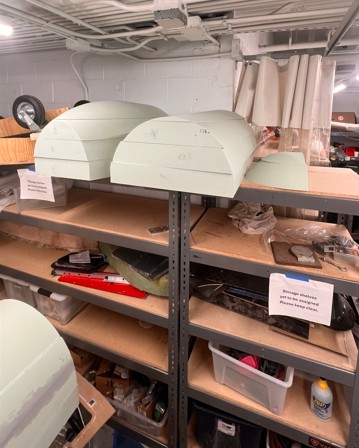
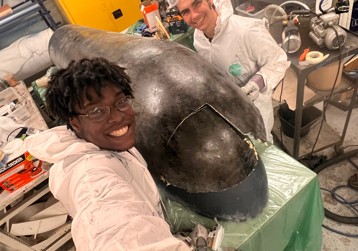
I onboarded my new members by teaching them to create layup surface. We did a layup with the old negative mold as well as with our created positive mold. Here are images of the created layup surface (with chemicals used behind it), positive layup result, and negative layup results.
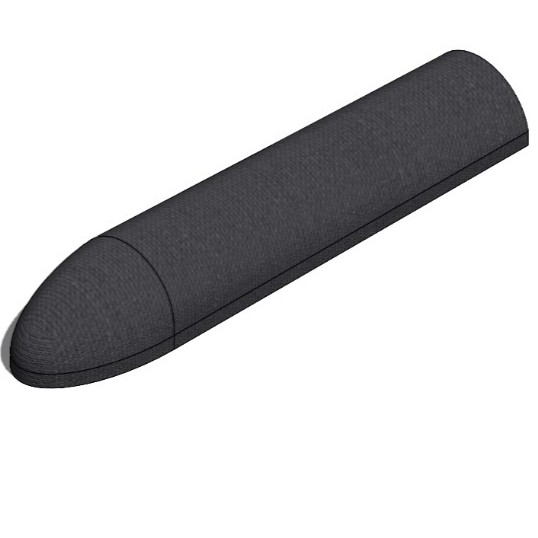
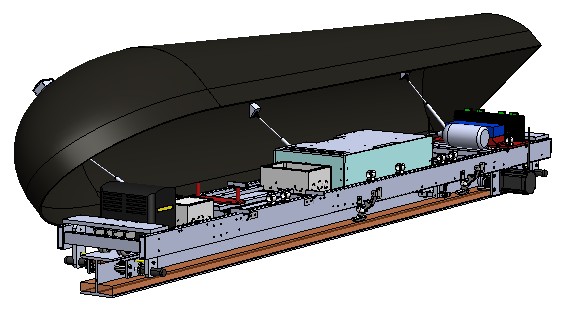
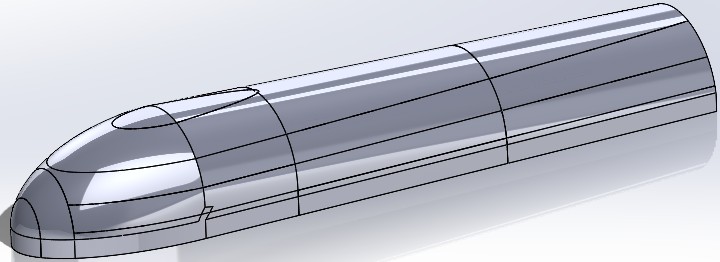
Now that I understood the process for creating a positive mold I got started on plans for the full sized mock-up. At the very beginning I created what I wanted the aeroshell to look like. At the very top of the page you can see what that looks like. Below you’ll see how it looks attached to the overall pod.
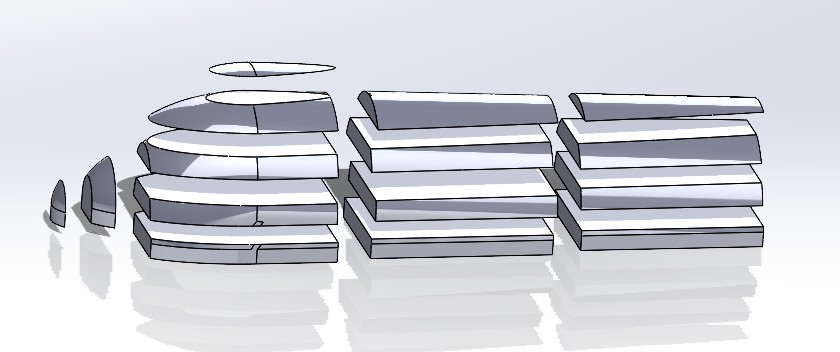
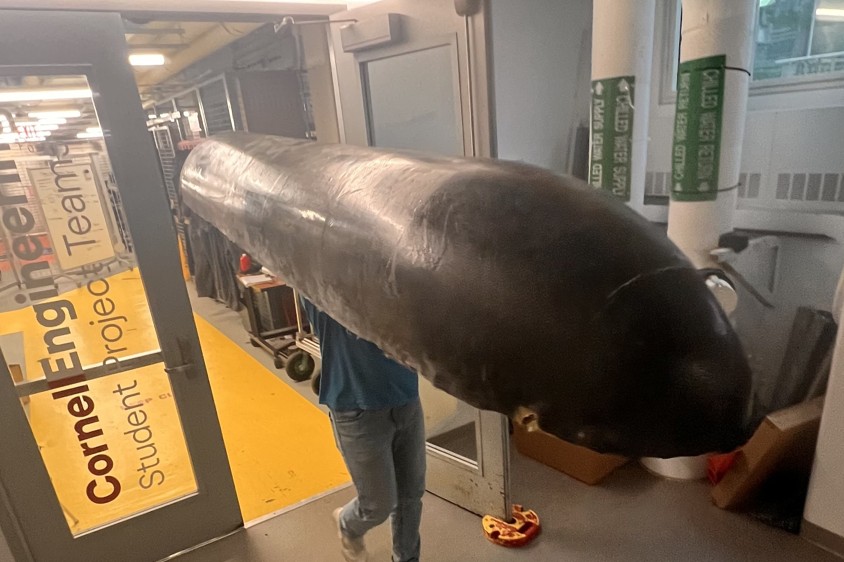
Next, I ordered large amounts of high density foam for our full-sized 9-foot long aeroshell. Cornell’s Digital Design & Fabrication Studio (D2FS) and I also worked together to CNC the foam in several pieces because they could not do it all at once. So I cut my CAD file into 15 pieces, got each CNCed, and used a strong adhesive foam spray to keep everything together.
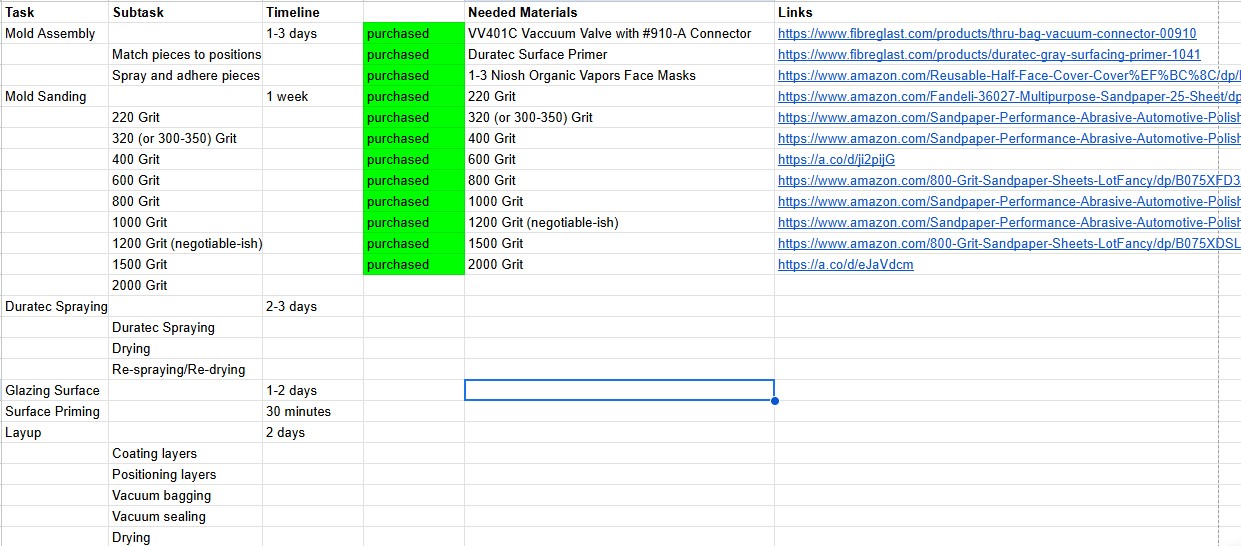
Layup Timeline & Materials to Purchase:
Foam Pieces:
Test Adhesion:
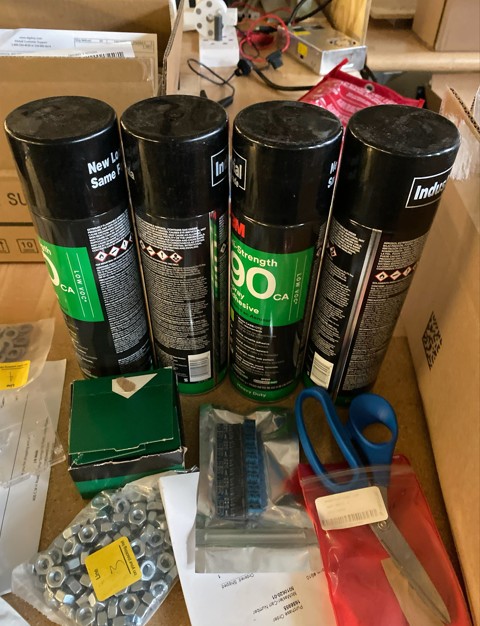
- Put two of the large layers together using 3M Foam spray to test ahesive strength
- Used Bondo Body Filler to ensure smooth curvature and fill deformations made by excessive sanding
Assembly Process:
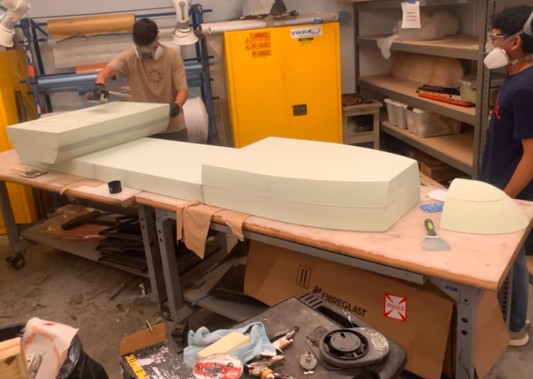
- Placed large vacuum bag on top of table to make creating full vacuum seal easier later
- Underclassmen and I placed, adhered, and assembled each piece of full-scale mold
Completed Assembly:
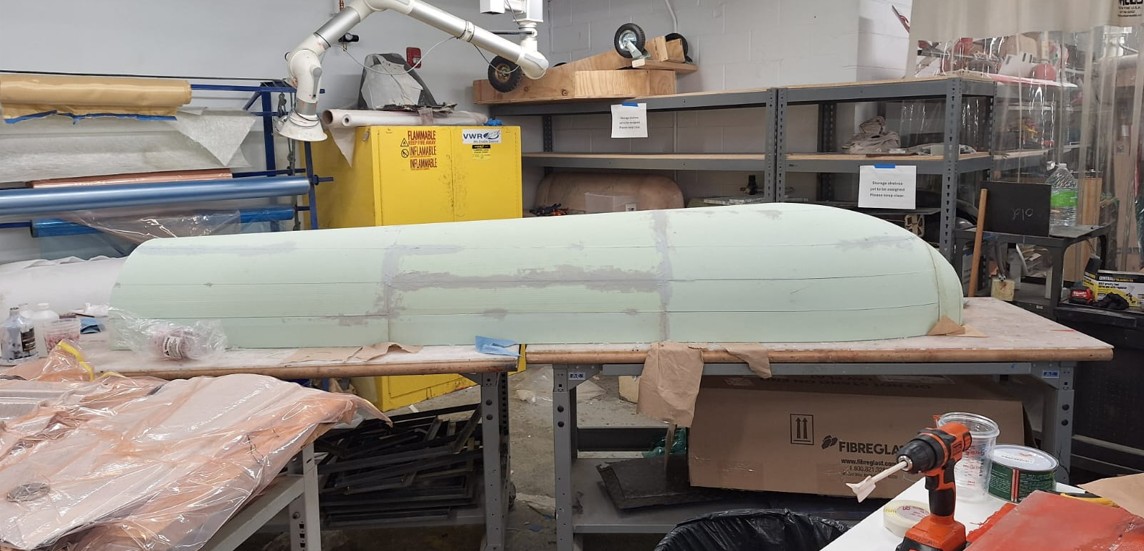
Sanding Assembly:
- All hands on deck with other members of Mechanical Team helping with the dry sanding
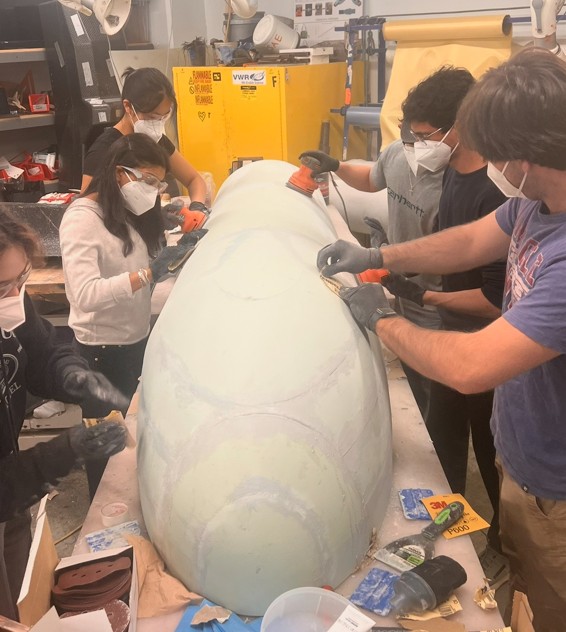
Orbital Sanding:
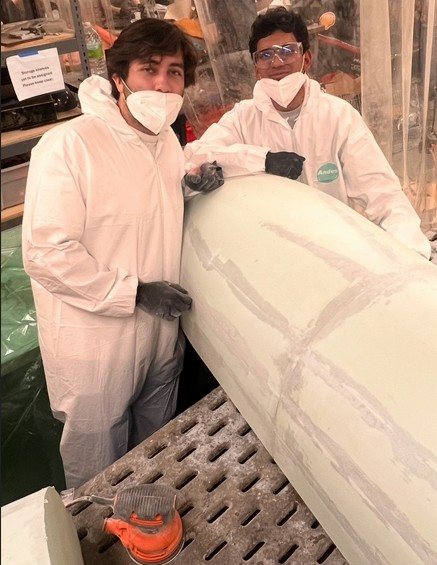
- Hand sanding grit by grit would be impossibly long because of mold size
- Decided to use orbital sanders with each of the grits instead
- Purchased safety equipment like suits and NIOSH organic vapor masks to be used for this process and future Duratec sanding
Fabrication Issues:
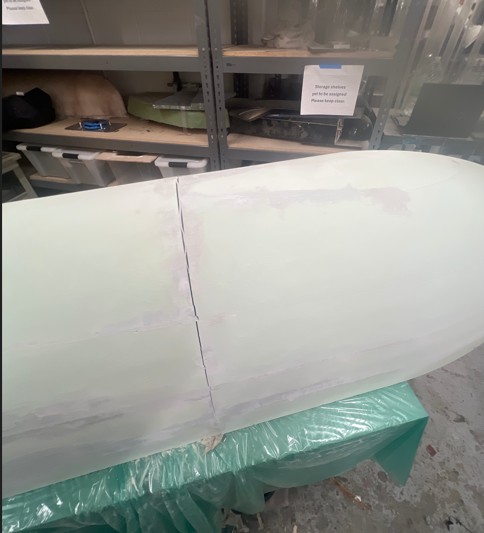
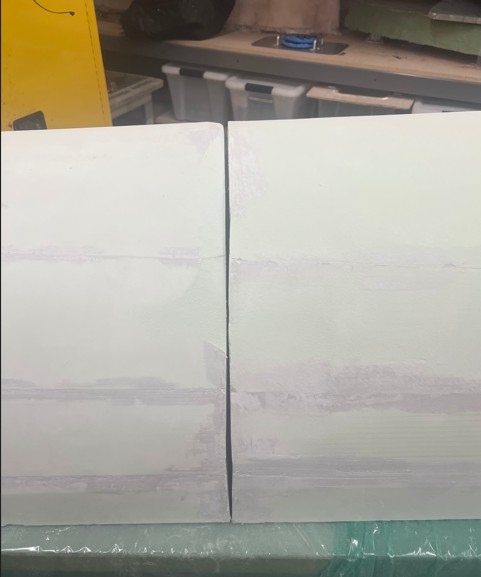
- Had a large misalignment due to excessive sanding
- Fixed issue with Bondo and sanded smooth once more
- Faced continuous issues with cracking due to large mold size and having to move mold in and out of space used to work on it
- Had to continuously patch cracks with Bondo and then sand smooth
Completed Duratec Coating:
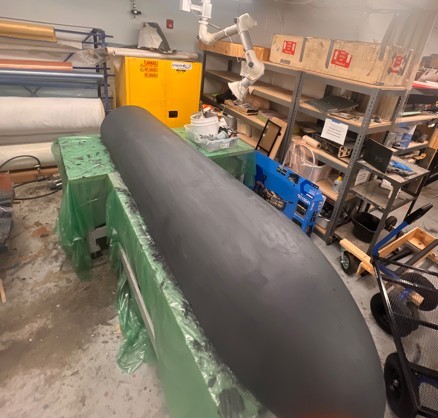
- Once sanded till smooth we aerosol sprayed 5 layers of Duratec surface primer onto mold
- After spraying, we wet sanded smooth by hand using sandpaper sheets
- This once again took the help of more of the overall Mechanical Team because of the sheer size of the mold.
Finishing the Layup:
- Finished the layup according to the previously outlined process
- Cut off the excess carbon fiber from the edges using a dremel
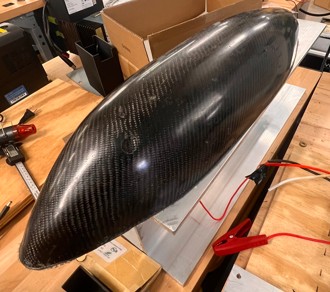
Final Issues:
- Had crack in shell at the end
- Determined it was either an issue of epoxy ratio or vacuum sealing
- Patched by wrapping piece of carbon fiber under and over nose, infusing with epoxy and allowing to dry
- Had vacuum sealing issue
- Could not get air to completely evacuate from under vacuum bag
- Assumed this was because of massive area needed to create air tight seal on
Future Considerations:
- Future pod will be smaller so we should not have as hard a time with cracking and vacuum sealing.
- Next time, we’ll create a negative mold instead of a positive mold
- Issues with not all parts of surface having smooth epoxy infusion
- Issues with nose shaping becuase of curvature
- Crack in large shell We hope that these changes will lead to a smoother fabrication process and easier curing. We are also leaving documentation for future members of our team about the fabrication process and papers on work we have done that were submitted to competition. Find below the white paper written by myself and other Mechanical Team Leads about our work up until March of 2025.
Technologies Used: Solidworks, CNC Milling, Composite Materials
Back to Projects